For entrepreneurs, startups, and established companies trying out new projects, there hopefully comes a time when interest in the app increases such that incoming traffic levels start to rise significantly. This will likely necessitate various improvements to the infrastructure running the application so that it’s more robust, reliable and scalable.
The application may previously have been running on a cheap hosted server on a service like DigitalOcean, Linode or OVHcloud, or possibly even a single EC2 (Elastic Compute Cloud) instance on AWS (Amazon Web Services), and the desired solution would now be to move the application to a dynamically auto-scaled EC2 environment so that it can handle the increasing traffic without resource problems and site downtime.
In order to achieve this, it will also be necessary to set up the database on AWS, and the most realistic solution for this is to use Amazon’s RDS (Relational Database Service). I’ve recently covered this process in my article Migrating a MySQL database to AWS (with specific focus on RDS). You’ll also need to set up a load balancer, most likely an ELB (Elastic Load Balancer), to balance the incoming traffic across the auto-scaled EC2 application instances. I’ve recently covered this topic also, in my article Choosing and setting up a load balancer in AWS. So have a read through both of those articles to begin with, and below I’ll cover the rest of the process, i.e. auto-scaling the application instances on EC2.
Launching and configuring an EC2 instance
If you’re already running your app on a single EC2 instance then you may be able to use this as the basis for your auto-scaled cluster of instances. However, if you think you may prefer a fresh start, or if you haven’t yet set up an EC2 instance (i.e. if your app is currently running somewhere other than AWS) then you’ll need to launch a new EC2 instance then set it up as needed.
Choosing an AMI
First of all you’ll need to pick an AMI (Amazon Machine Image), which is basically a template providing what will be the basis of your instance when it first launches. In the EC2 web console, go to the Instances page, then click the big orange “Launch instances” button at the top right, and you should see something like this:
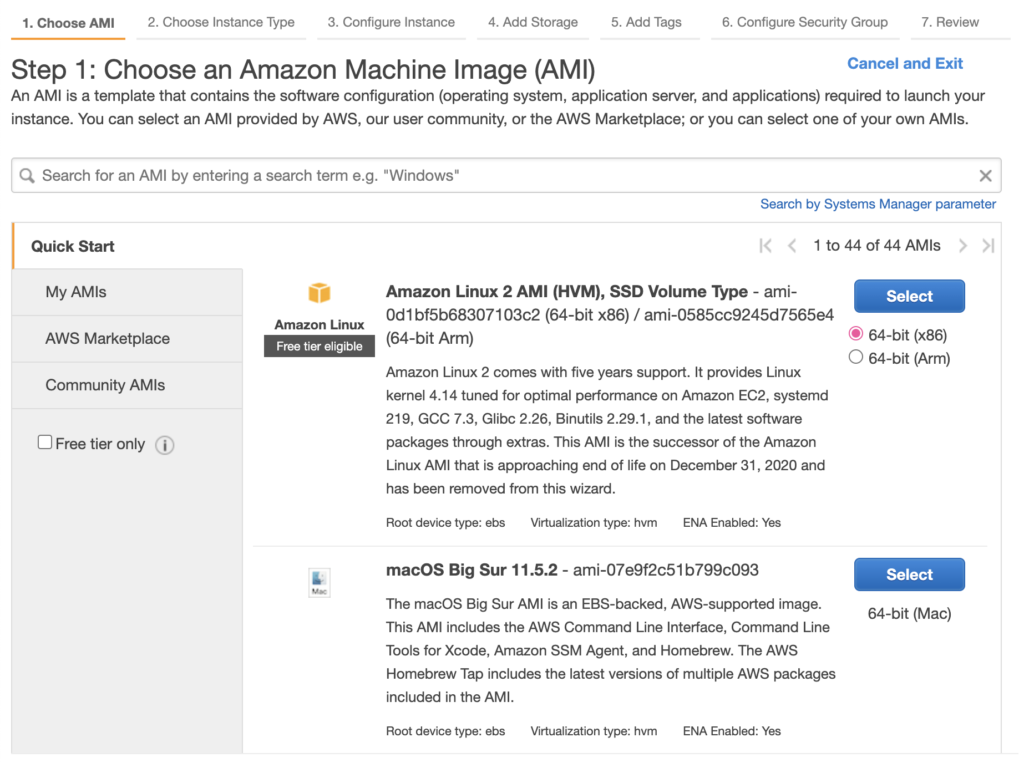
What AMI you choose here will depend on a combination of factors, primarily a mixture of your application’s requirements and your personal preferences. There are many AMIs to choose from in the AMS Marketplace and Community AMIs sections. You may wish to choose a base Linux distribution such as Red Hat or Debian, then install and configure software packages yourself. Your app may require an eCommerce system such as Magento, or a content management system such as WordPress or Drupal, in which case you may want to pick an AMI which comes with that system already installed. If possible I would generally suggest picking an AMI from the AWS Marketplace, as those are verified by Amazon. The Community AMIs can be riskier in terms of security, as there are fewer guarantees of safety, so it’s best to be more careful when selecting one of those.
If you’re going to be installing all your own packages, and if you’re unsure what Linux distribution to use, it’s probably not a bad idea to choose the latest version of Amazon Linux. Amazon Linux 2 is roughly similar to Red Hat (though it’s diverged somewhat from a standard Red Hat setup) so it’s quite robust and stable, plus it’s got a number of convenient tools for managing packages effectively, and it’s maintained by Amazon so is quite nicely aligned for use within Amazon EC2.
Choosing an instance type
Once you’ve selected the AMI you want, the next screen you should see will be something like this:
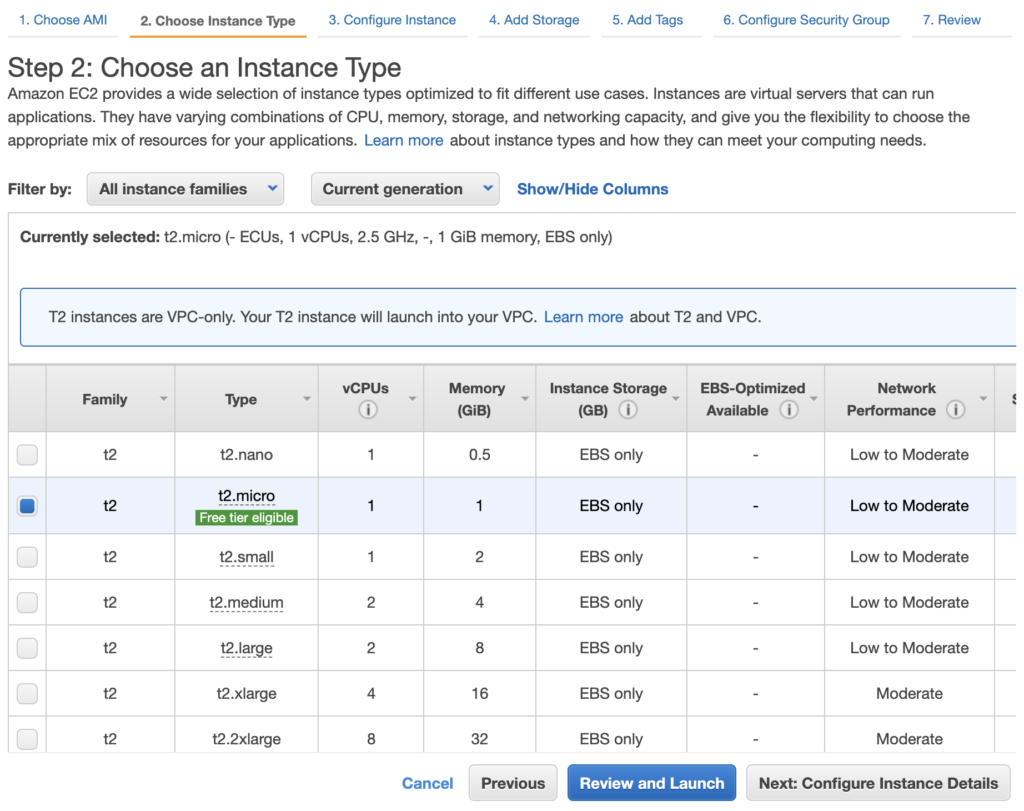
Instance type selection can be quite daunting nowadays due to the huge range of EC2 instance types available. Start by taking a look at the EC2 Instance Types page. At this stage it’s probably best to keep it simple, and unless you know your application is unusually hungry for a particular resource such as CPU, memory or storage IO (in which case perhaps look at “Compute Optimised”, “Memory Optimised” or “Storage Optimised” respectively), I’d suggest sticking with “General Purpose” for now. You can always change it later.
Even in General Purpose there are quite a few different categories. For a production environment you’ll probably want to avoid the “T” categories as these try to save costs by offering burstable performance, which can be good for development, demo, test and QA environments where incoming traffic is sporadic, but not so good for production environments where traffic is usually fairly constant. The current latest standard type is M5, and these offer a simple and effective balance of resource availability. Ideally you’d want to keep the smallest possible option to keep costs down, then rely on horizontal scaling (auto-scaling) to scale in and out with the appropriate number of instances needed as traffic ramps up and down. At this stage, unless you know of a good reason not to (e.g. unusually large bursts of traffic or some such) it’s probably best to go with the basic m5.large instance type. Find that on the list and select it, then click on the option to go to the next page for configuring instance details.
Configuring instance details
You should now see a page similar to the following:

Your VPC should already be selected, and at this early stage you probably won’t be worrying about data centre redundancy so you can pick a subnet for any availability zone. You’ll want a Public IP for this instance so you can SSH into it. The rest of the options can be left as defaults for now, since they’re the kind of specialised options that you’ll probably only want to start tweaking once you have a more complex infrastructure.
Adding storage
The next page allows you to configure storage for your instance:
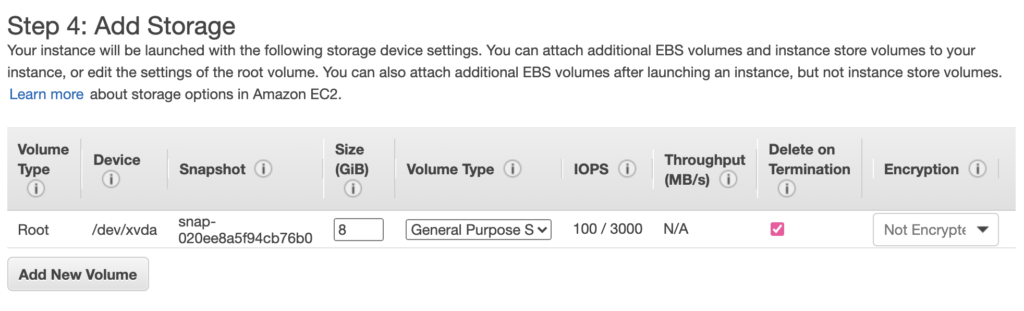
Again, the defaults here should generally be fine for now. Later you can change the storage type and the encryption, and add more volumes, etc. The only thing you’re likely to want to change now is the size, as you may want to increase that to allow enough space for all the code and assets needed for your application.
Adding tags
The next page allows you to add tags:

You can add whatever tags you like here. Initially you may only want to set a Name tag, in order to give the instance a suitable name, but other tags are likely to come in useful later for being able to track categories of server and EC2 inventory, as well as for intelligently automated deployments and so forth.
Configuring security group
If you have an existing security group you want to use then you can select it here, otherwise this screen enables you to set up a new security group:
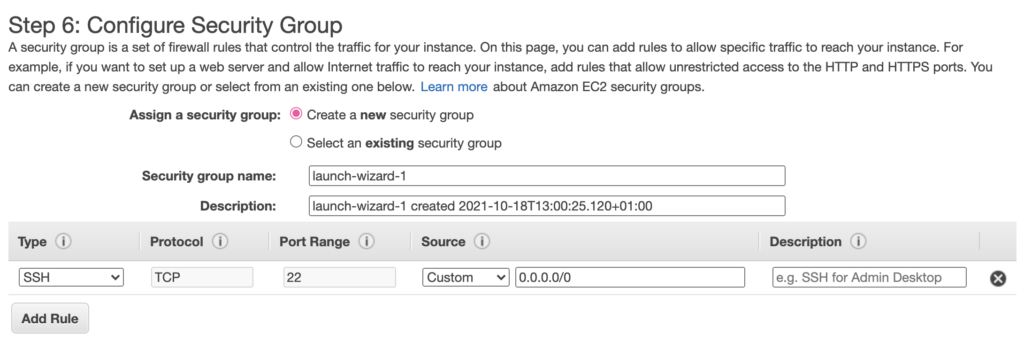
By default, port 22 is permitted from all locations so you are able to SSH into the server. You can add whatever other ports you need, e.g. if your application listens on port 80 then you’ll need to add that. To keep things as secure as possible, rather than opening port 80 to the world, you can specify the ELB’s security group as the source, then incoming connections to your application will only be allowed from the load balancer.
Review and launch
The final page allows you to review the settings you’ve chosen, then when you click the Launch button you’ll be asked to select an existing SSH key pair if you have one, or to create a new one if you don’t. When creating a new key pair, ensure you download the private key (.pem) file to somewhere very safe and secure, since you’ll never have the chance to download it again, and losing it could mean you get locked out of your EC2 instances.
If you now return to your Instances page in the EC2 web console, you should see the new instance starting up, going through its checks, then enter the Running state. Grab the public IP address and you should be able to SSH into it using the private key file you downloaded previously (use ssh -i to specify the .pem file).
You’ll now want to set up the EC2 instance as needed, installing all needed software and modules, and deploying your code. You should consider making your instance as secure as possible at this stage, so my guide for security hardening on CentOS 7, Red Hat Enterprise Linux 7 & Amazon Linux may be of help to you here.
Once you have the new instance all set up and running correctly, it’s time to move on to clustering the instance with auto-scaling.
Creating an image and setting up auto-scaling
It’s now possible to create our own AMI image from the new instance, which we’ll be able to use as the basis of an auto-scaled cluster.
Creating an image
Creating an AMI is generally quite straightforward. On the Instances page in the EC2 web console, right-click on your instance and choose “Images and templates” ► “Create image”, then you should see a page like this:
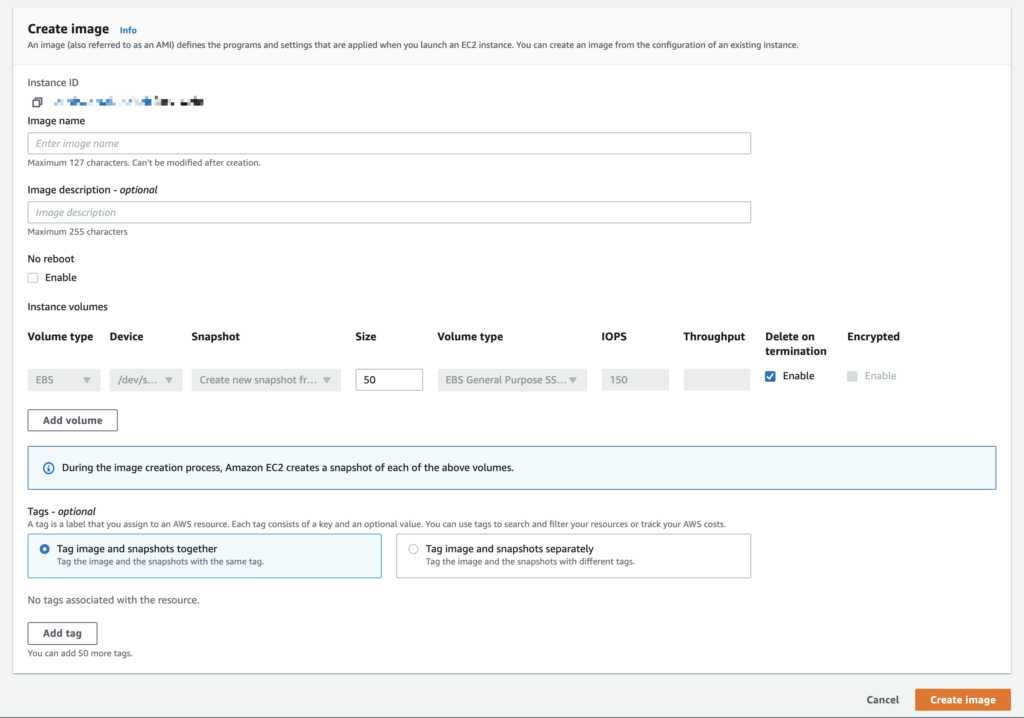
Give the image a suitable name you’ll remember, and add a description and/or tags if you’d like. It’s generally worth choosing the “no reboot” option as that prevents the instance from becoming inaccessible whilst the AMI is being created. It’s highly advisable to enable the “delete on termination” option for the storage volume, otherwise you’ll end up with lots of orphaned storage volumes lying around costing money after your cluster has scaled up and down a few times.
Once you’ve started the process, go to the AMI section in the EC2 web console and you’ll see the new AMI in there. It will take a while before the creation process completes and it becomes marked as Available. Make a note of the AMI ID as you’ll need that in the next part of the process.
Creating a launch template
The first part of setting up auto-scaling requires the creation of a new launch template. (Previously this involved the creation of a launch configuration, but Amazon is now encouraging us to use launch templates instead of launch configurations.) So, head to the Launch Templates page in the EC2 web console, then click the “Create launch template” button:
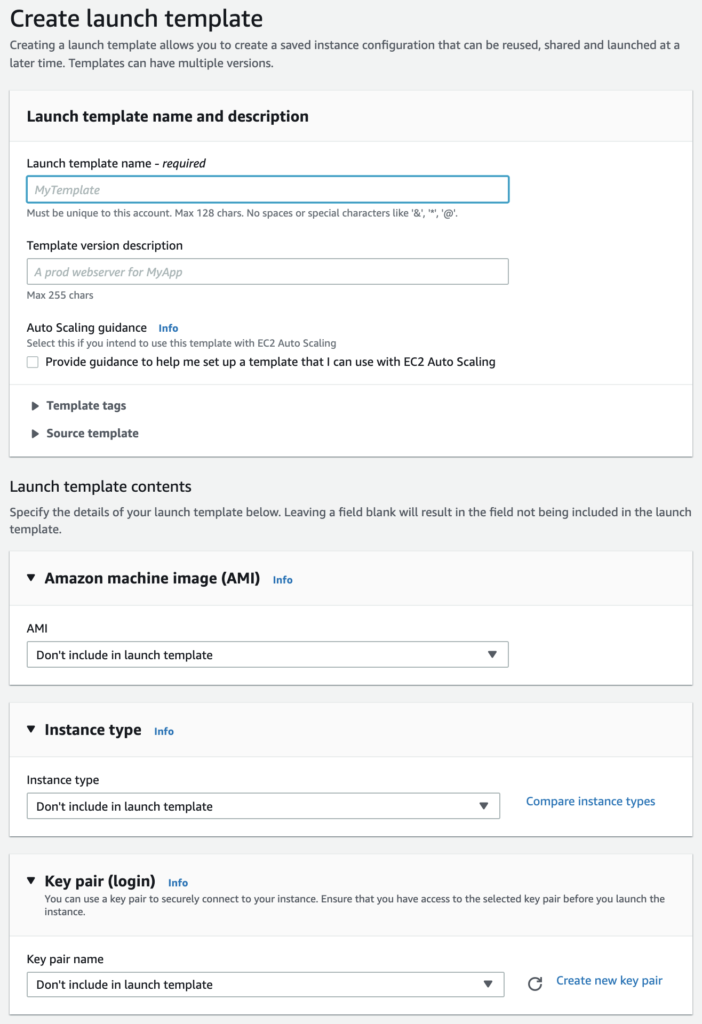
It’s helpful to tick the box for guidance to help set up a template suitable for auto-scaling. You’ll need to set the template a name, then select the AMI you created previously (you’ll want to paste in the AMI ID in order to speed up the process of selecting the AMI from the list). If you’re happy with the instance type you chose earlier, you may as well include that here in the template (rather than specifying it later in the auto-scaling configuration). You can also specify your key pair here, to cut down additional configuration later.

Choose the security group you created earlier. The storage volume should already be selected based on how that’s set up in the AMI. Add any tags you like (though none are necessary) then click the button to create the launch template.
Creating an Auto Scaling group
Next, click on Auto Scaling Groups in the EC2 web console, and click the button to create an Auto Scaling group:
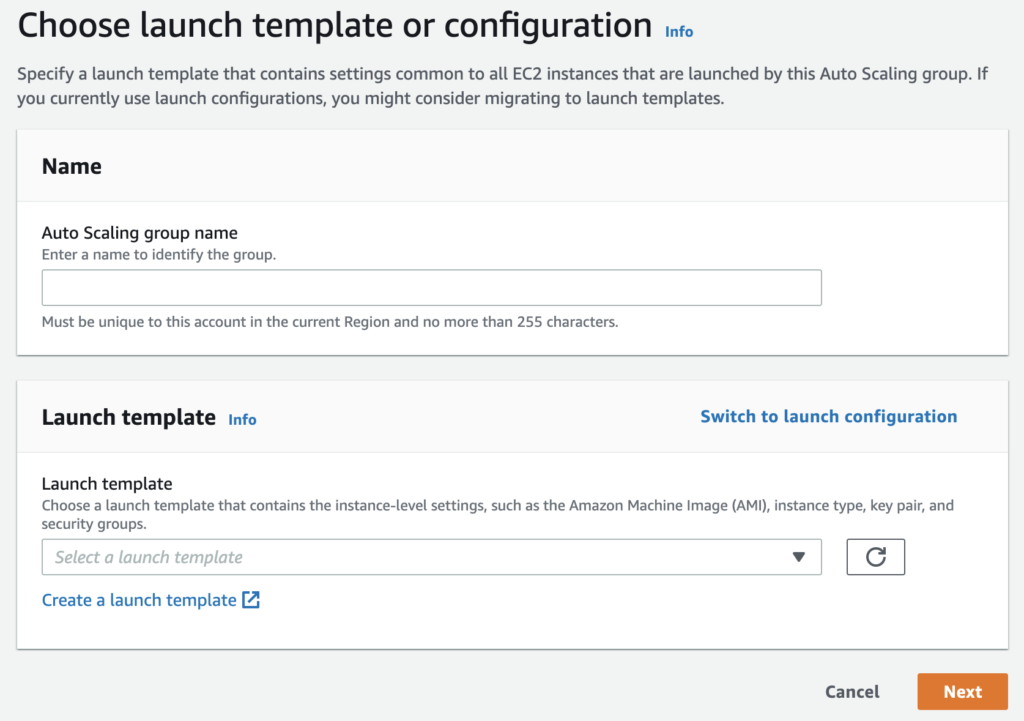
Give it a name, then choose the launch template you created previously.
Here, just select your VPC and add whatever subnets you like. Just one subnet is fine to start with. Later, as you consider more in the way of high availability and disaster recovery, you’ll probably want to deploy across multiple subnets/availability zones for redundancy across data centres.
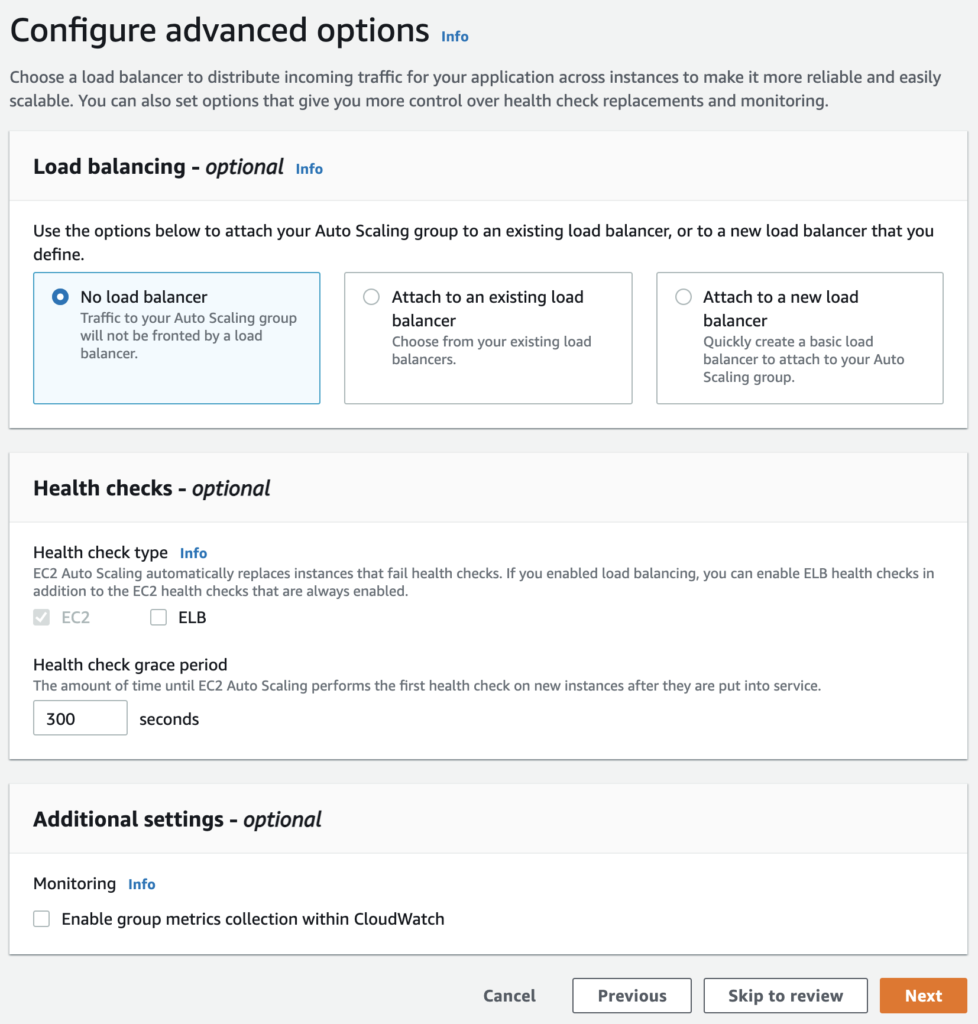
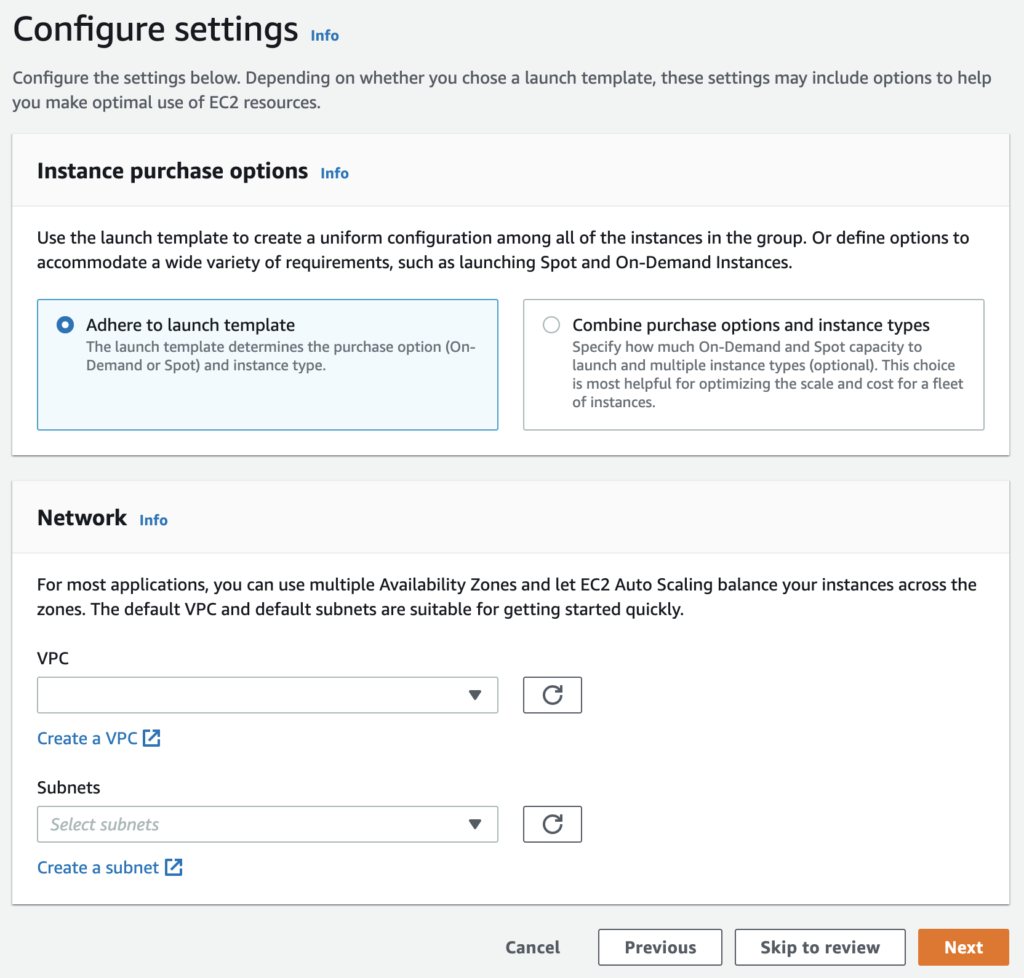
On this page, choose the option to attach the group to your existing load balancer’s target group. You can add the ELB health check as an option for determining when an instance is unhealthy (but don’t worry about that for now if you’re unsure) and you can also optionally add group metrics collection for CloudWatch.
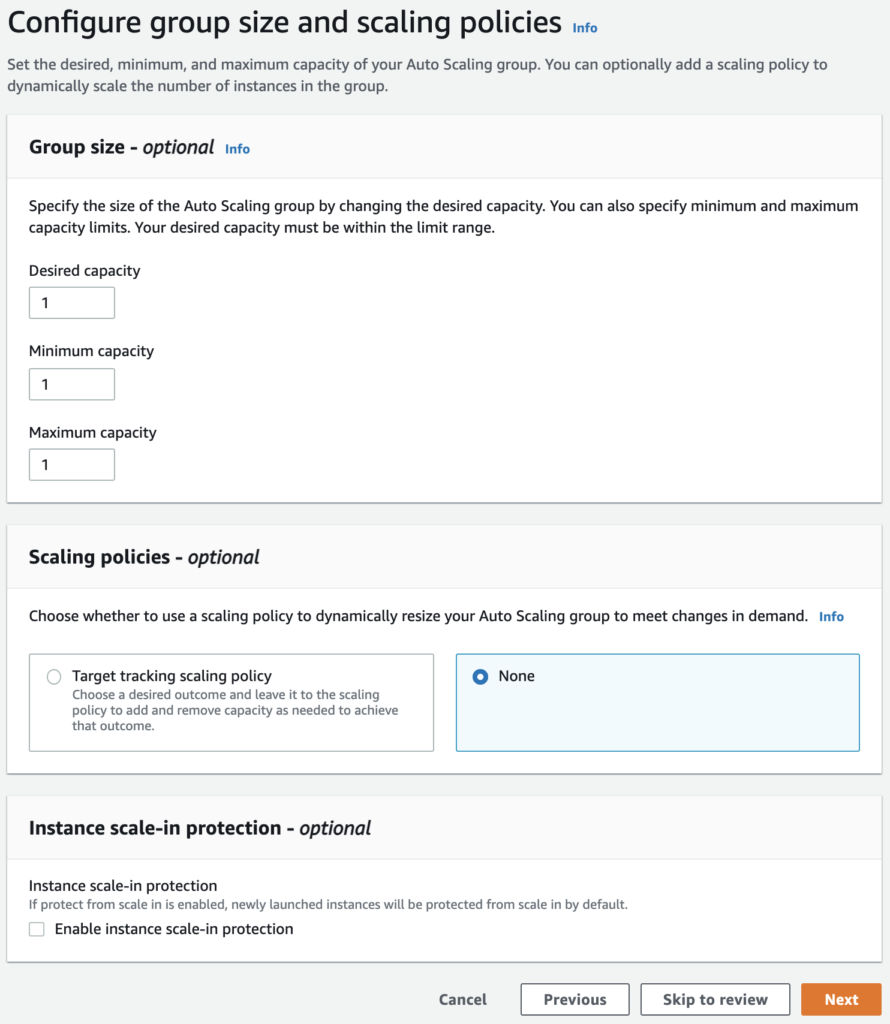
Being able to specify group size and scaling policies is where auto-scaling really comes into its own. To start with you’ll almost certainly want to keep the desired and minimum capacities at 1, but you can set a maximum capacity, which is the largest number of instances you’d want running at any given time. As you initially experiment with auto-scaling, maybe set this to a fairly modest number such as 3.
The scaling policy enables you to determine the conditions which cause the group of instances to grow or shrink in size. To begin with, choose the “target tracking” option, then you can go with the default of 50 percent average CPU utilisation (as always, this can be changed later). This means that the number of instances will change as needed in order to keep the CPU on each instance at roughly 50 percent. So, if you have two instances running, and the CPU starts to go significantly above 50 percent usage due to greater incoming traffic, then it will launch a third instance to share the load, so that the average CPU for all three instances drops back to 50 percent. Similarly, when the average CPU drops significantly below 50 percent again because incoming traffic has reduced, one of the instances will be terminated so that the CPU averages out at 50 percent again on two instances. This means that you’re only paying for the number of instances necessary at any given time to handle the incoming traffic smoothly and robustly, without the site slowing down due to excessive CPU usage.
The pages after this are for SNS notifications and tags which are optional, and we’ll skip this for now (although you can add them if you want to of course).
Once you’ve got the Auto Scaling group created, if you watch the Instances page in the EC2 web console, you should see one or more instances launching as per your scaling policy. Then you can go to the load balancer’s target groups in the Target Groups page, and if you look at the Targets in your target group then you should see that those newly auto-scaled instances now appear in there.
That’s it! Your web application should now be running on a dynamically auto-scaled group of instances with the load distributed across the instances by your load balancer.
Additional points to consider
Using the original instance as a staging server
You can now use the original instance for staging purposes, so that you can test new app updates when they’re released on this instance. Once new updates are released and tested, you can make a new image of this instance and use that AMI as the basis for updating the launch template for your auto-scaling group so that the newly scaled instances are using the updated app. (As time goes on you’ll be using much faster and more efficient automated procedures for code integration and deployment, but this is a good place to start.)
Benchmarking/stress testing
If you still don’t have much traffic, your scaling group may be stuck on one instance currently, and you may be wondering how to test it in order to see if it’s auto-scaling as intended. There are various approaches you can take.
One option could be to use a server benchmarking tool such as Apache’s ab in order to simulate how your infrastructure behaves when large amounts of traffic are incoming. Just install the tool on your local machine and run it against your site. It helps to have a fast internet connection, and it’s even better if you can run it on multiple machines from multiple locations to simulate a lot of traffic from multiple sources.
An alternative approach is to SSH into the auto-scaled instances and run the stress tool to increase the CPU usage in order to trigger an auto-scaling event. (For Debian/Ubuntu systems you should be able to install stress via apt, and for Red Hat type systems you should be able to install stress via yum if you have the EPEL repository added.)
Final thoughts
I hope this article has helped with migrating your app to an auto-scaled environment on AWS. I’ve tried to cover all the basics as thoroughly as possible. If any problems or issues arise, or if you’re already outgrowing this simple setup and want to explore other possibilities, get in touch to avail yourself of my DevOps and SysAdmin services to help you solve issues and grow and manage your infrastructure quickly and effectively.