If you’ve been running a web application on just one or two servers which contain your web server, application framework and database, there will likely come a time when you need to scale to cope with higher load from more incoming traffic. Whilst the web/application side of things can usually be scaled horizontally across multiple servers without too much trouble, a MySQL database is not so straightforward.
You may be using one or two EC2 instances, or your infrastructure may be hosted somewhere other than AWS. We’ll assume here that you’re migrating the whole app to AWS (if it’s not there already) and that you need to put the database somewhere within AWS as part of the scaling-up process. There are basically two options: install MySQL on one or more EC2 instances and administer it yourself; or use Amazon’s RDS (Relational Database Service) as a simpler way of hosting and managing your database.
Installing and administering MySQL on an EC2 instance gives you full and complete control of the database, how it’s installed and configured, and how it’s administered. This may be desirable for those who like to have a lot of control over their setup so they can tune things precisely how they like, and it may be the best option in unusual situations where direct control of the database is needed for certain proprietary applications. In general, however, RDS eases the transition and the management of the database whilst still giving enough visibility and tuning/configuration possibilities for all but the most esoteric of situations. In this article, then, I will focus on migrating a MySQL database from an existing server to RDS.
Resources, scaling and instance types
The first thing to consider is resource usage, instance size and scaling options. You’ll want to check the specification of your current instance and try to get some idea of how much resource MySQL is currently using on it, in order to estimate what instance type to choose in RDS. Don’t worry too much if you get this wrong, because vertically scaling an RDS instance later (i.e. migrating it to a more powerful instance type) isn’t complicated and doesn’t incur too much downtime, so it’s not the end of the world if you find your initial choice is underpowered and you need to migrate it to a larger instance. You can also consider horizontal scaling options now or later, i.e. creating a read replica of the primary database instance, then telling your application to use the replica for read operations, thus taking load off the primary which is then freed up specifically for write operations.
To get a good overall feel for your current server and how much resource MySQL is using on it, a tool like htop is a great starting point. This shows you how many CPU cores you have, how much each core is being used, how much memory you have available, the load average, and also how much CPU and memory is being used by each individual process. So, you can get an overview of the server and then see how much memory and CPU is being consumed by MySQL. It’s a good idea to check a few times, at different times of the day, to get a solid sense of what’s happening on the server, specifically with regard to the database.

Let’s say your current server has four CPU cores and 16 GB of physical memory, and after monitoring htop for a while you see that MySQL is using, at peak times, no more than half the available memory and CPU. So you could look at the Amazon RDS Instance Types page and estimate that two virtual cores and 8 GB memory would be more than adequate, therefore you could choose the db.m5.large instance type as a fairly safe starting point.
It’s possible to take this further and look into storage input/output performance, IOPS calculations, and so forth, but we probably don’t need to get too bogged down in such things at this stage. When starting out on AWS, we can make a good guess about what’s needed then easily scale up/down later after checking how the instance performs. Later, when your app has a lot more traffic and precise performance calculations become relevant, that will be the time for more precision regarding I/O and related issues.
Creating the RDS database instance
We should now be in a position to create an RDS instance, so in the RDS web console go to Databases and then click the “Create database” button.
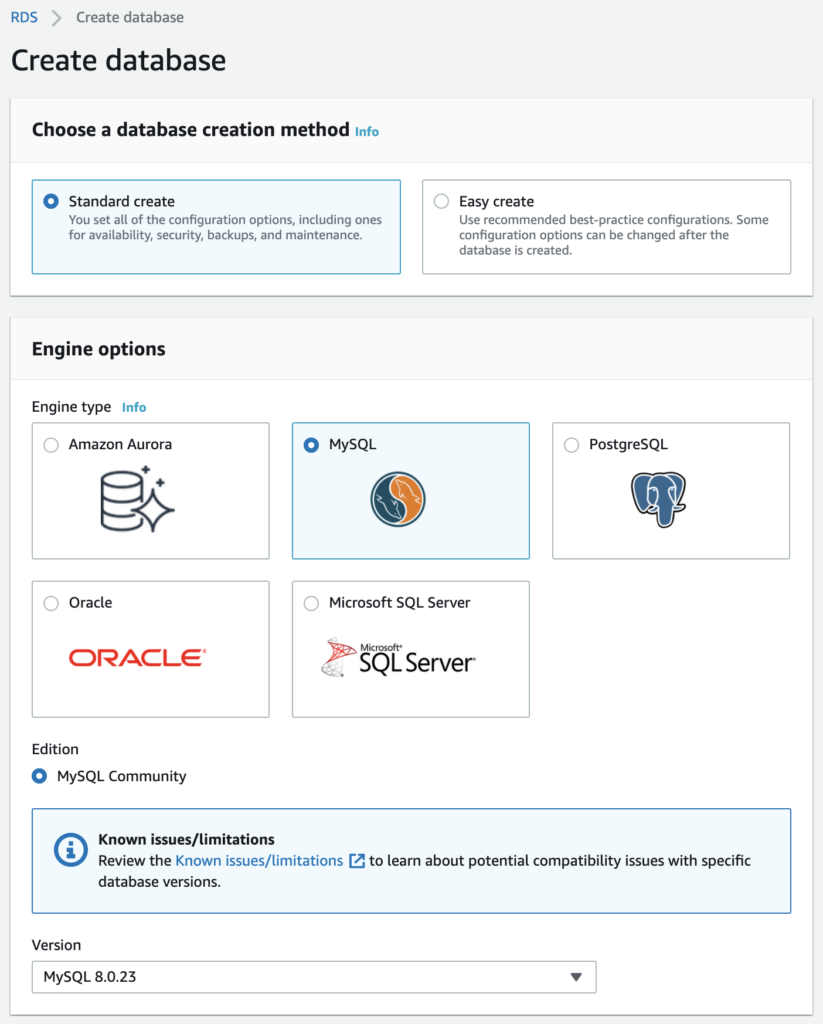
I would recommend choosing “Standard create” otherwise you may end up paying for some options you don’t necessarily want. “Engine type” of course should be MySQL. Then you can pick the version you need. I’d advise sticking with the same major version as you’re currently using, unless you know for sure after testing that it’s safe to go for a newer major version (if available). If you’re using a version that’s going out of date, you can migrate to a newer version later after doing some suitable testing with a separate database instance optimised for testing purposes.

Stick with “Production” as the template, unless you are setting up a development/testing site rather than a live environment. You can set the username and password as you’d like (you don’t need to keep the default username of “admin” if you prefer something else).
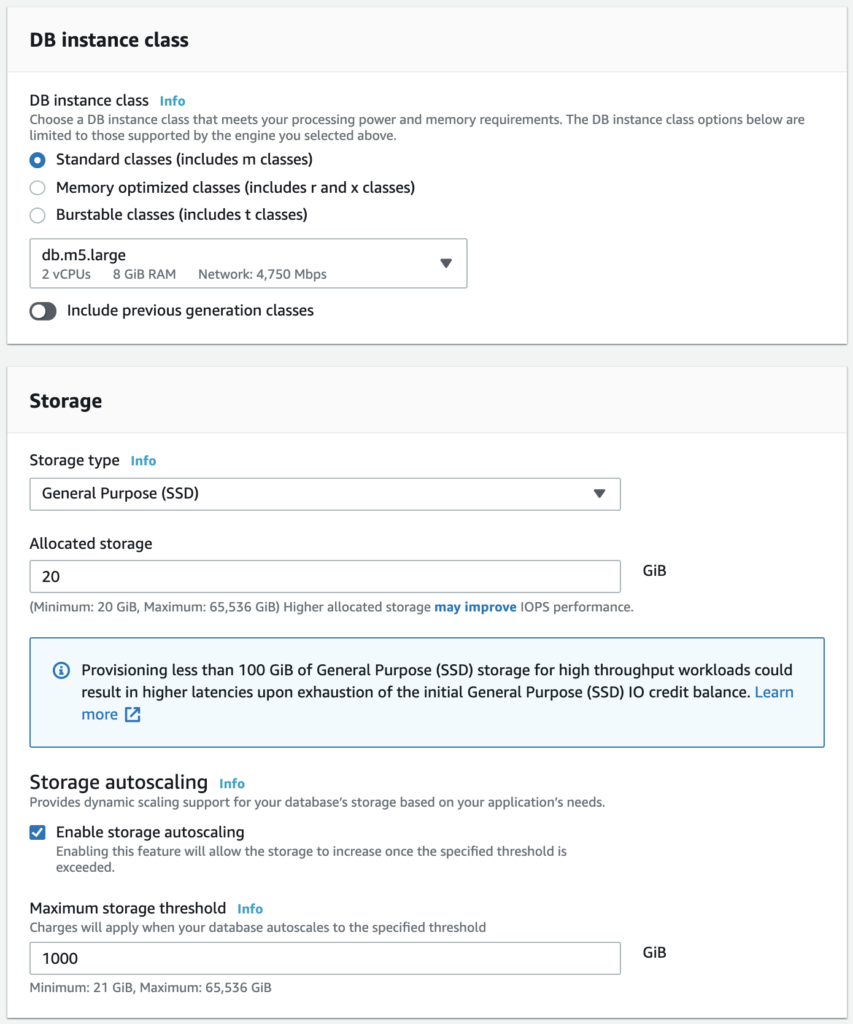
For the instance class you should probably stick with standard classes for now unless you’re sure you want something different, then choose the instance type you’ve decided upon. (Here I’ve selected db.m5.large as per the example I gave above.) Since we’re just starting out and haven’t made any IOPS calculations etc. at this stage, “General Purpose” storage is advisable here.
Specify more than enough storage to cover the current size of your database, and there’s no reason I’m aware of not to turn on autoscaling here. You probably have your own way of calculating your current database size. There are various ways to do this with SQL commands, or alternatively on your server you can issue a command like this:
du -sh /var/lib/mysql (Change /var/lib/mysql accordingly if your MySQL files are elsewhere on the server.) The result of this will show you how much space all the database files are taking up in storage.
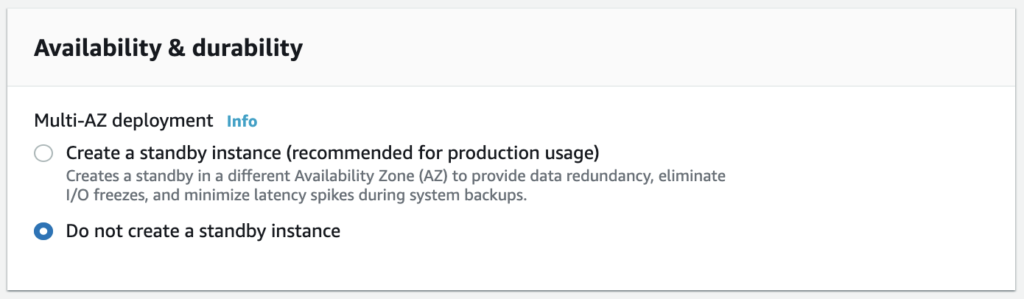
A Multi-AZ database is a nice thing to have for added reliability, but it does increase the cost, so it might be better to avoid it at this stage unless you’re really sure you want that added peace of mind. My suggestion would be to consider it as an option to upgrade to later.
After that you need to select your VPC plus a suitable subnet which hopefully you’ll already have available, or you can go to your VPC settings and create one if not. (Setting up networking is a little outside the scope of this article, but I may focus more on VPC and networking issues in a later post.) You’ll almost certainly want to avoid public access for your RDS instance for security reasons, and you’ll need to use a VPC security group (or create a new one if needed) which allows MySQL access from the security group you use for your EC2 web application instances.
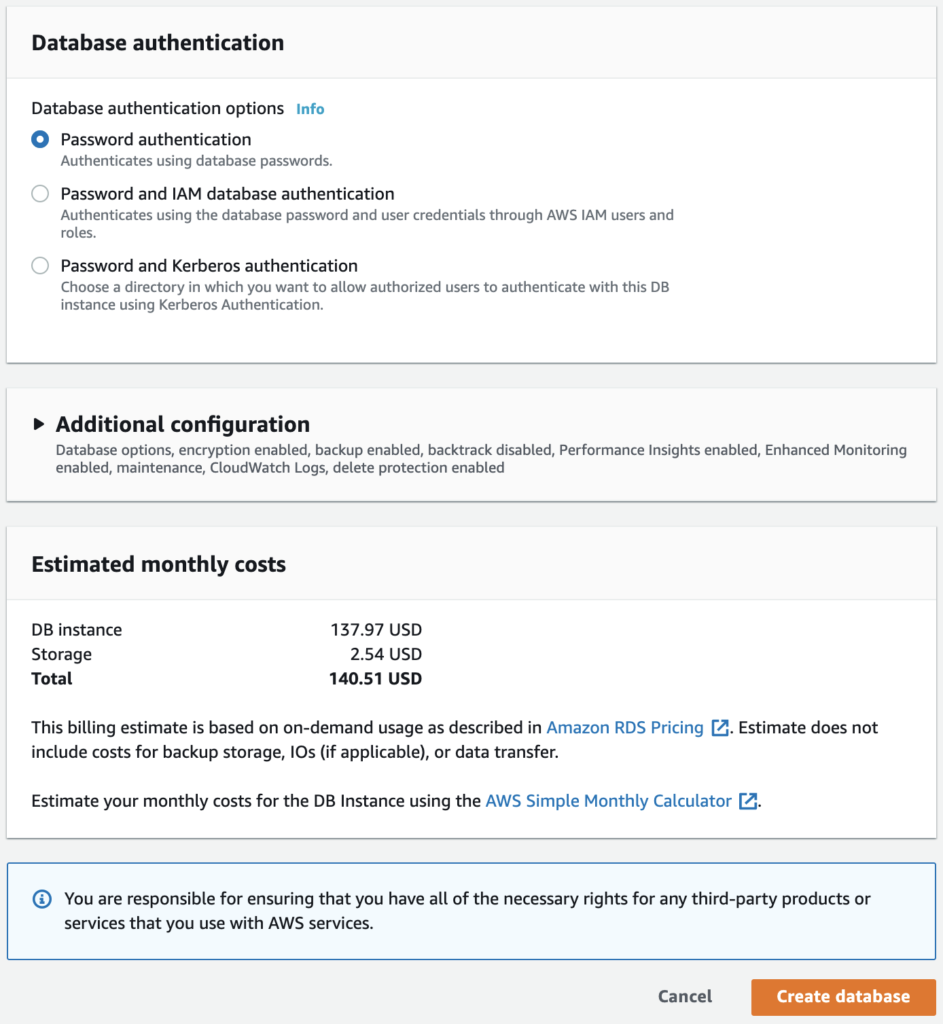
You can stick with the default of password authentication, or add IAM or Kerberos authentication if those are something you need. Finally there’s a summary showing estimated monthly costs from the options you’ve selected. If you like, you can add/remove/change options above to see how the monthly costs are impacted based on your selections. When you’re happy, click the “Create database” button.
Migrating the database to RDS
You may already have a preferred way of doing this, but if not then the simplest way to do this – so long as your database isn’t absolute huge – is to arrange downtime for your web site, then dump the existing database to a file, then populate the RDS instance from the file. The initial dump should hopefully be as simple as:
mysqldump --all-databases > /tmp/db_dump.sqlThen copy /tmp/db_dump.sql to an EC2 instance which has MySQL client tools installed and access to your new RDS instance, then populating the RDS instance should be possible quite simply as follows. You’ll need to get the instance endpoint from the database details in the RDS console, then use the endpoint as the host in the mysql command, and supply the username and password you chose previously:
mysql -h endpoint-name.rds.amazonaws.com -u admin -p < /tmp/db_dump.sqlAll being well, the RDS database instance will now contain all the databases, tables and data from your old server. You can check of course by connecting with the mysql command and typing SHOW DATABASES, etc.
Final thoughts
With your database up and running in an RDS instance, you should now be able to connect to it from the web application on your EC2 instances. In the RDS console you can keep an eye on the database performance in the Monitoring tab, to make sure that your CPU or memory usage isn’t going too high, in which case consider vertically scaling the database to a bigger instance type as discussed above. You can also launch a replica of this instance from the console, to handle read operations and to serve as a backup instance which can be promoted to primary in the event that the primary fails.
Another thing to put in place at this point, if you haven’t already, is backups. In the “Maintenance & backups” tab you can see what is set up currently in terms of backups, then modify the instance as needed. You can also take a manual snapshot here, e.g. if you are about to make some significant changes and you want to make sure you have a backup in place before you begin.
I hope this proves helpful as a general guide for initially migrating your MySQL database into AWS and RDS, and if I can be of further help then don’t hesitate to get in touch to ask about my SysAdmin and DevOps services.