When you want to run your web application on more than one EC2 instance for scaling and redundancy purposes, you will probably require some form of load balancer to distribute incoming requests evenly across the instances. There are various possible solutions for this.
One option is to launch another EC2 instance and install a load balancer on it yourself. There are quite a few open source load balancing options, though I would tend to recommend HAProxy as it’s fast, efficient, secure, and very flexible. This option involves setting up your Linux instance and installing the software you need yourself, then configuring your chosen load balancer and installing your SSL certificates, etc. Additionally you would need to estimate the necessary instance size to run the load balancing software without getting overloaded and slowing the site down (bearing in mind that SSL termination can be particularly CPU-intensive), then monitoring it accordingly.
Unless there’s a particular reason to take the approach of installing a load balancer on an EC2 instance, a simpler and more effective option – especially for companies taking their first steps into scaling multiple instances for their application – is likely to be Amazon’s own ELB (Elastic Load Balancer). This doesn’t require an EC2 instance with Linux setup, software installation and configuration, etc. It provides a simple interface with easy SSL termination and it will scale itself automatically as needed, so there is little required in the way of planning and monitoring.
You can add an ELB in the Load Balancers section of the EC2 service in the AWS web console. There are several types to choose from, but the one you will almost certainly want is the Application Load Balancer, because this is designed for regular web applications with fairly standard setups.
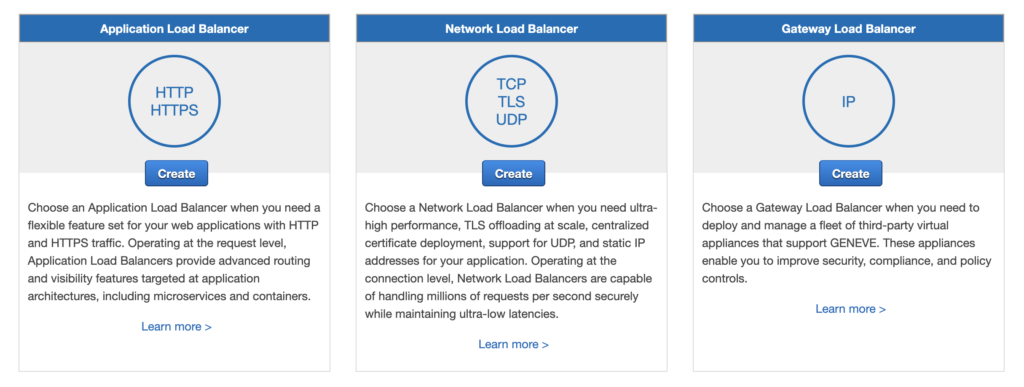
So, click the “Create” button on the Application Load Balancer to begin.
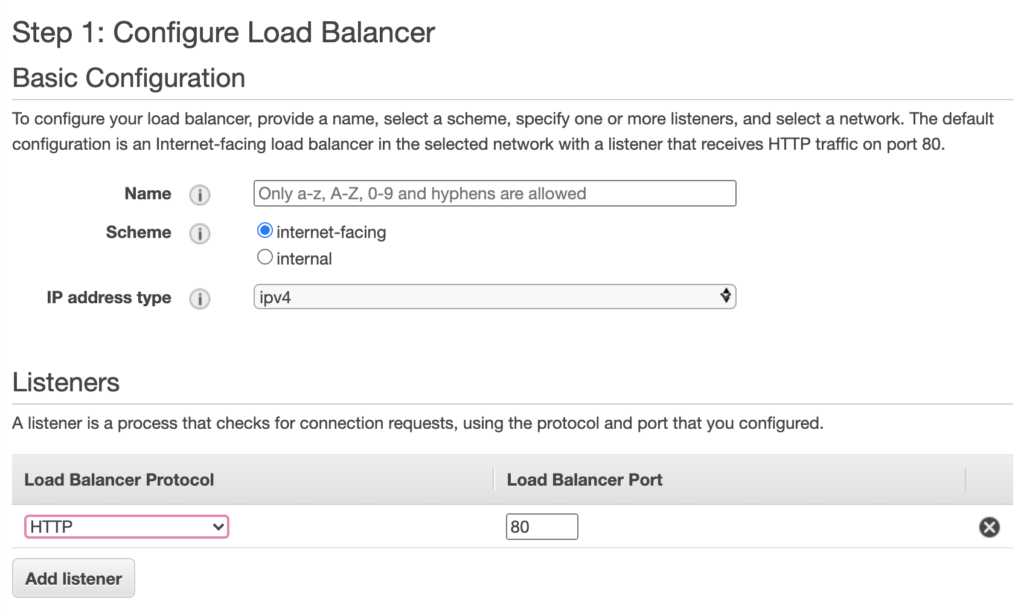
Give it a suitable name. Then, assuming your site is accessible via HTTPS (as should be the case nowadays) you’ll want to add another listener with HTTPS protocol on port 443.
Below this is a section to pick Availability Zones (associated with their corresponding subnets in your VPC). If you have more than one VPC then choose the correct VPC. You then need to choose at least two Availability Zones, so pick whichever zone(s) contain your web application instances, and if they’re only in one zone then pick that zone plus any other zone. Then move on to the next step to configure security settings.
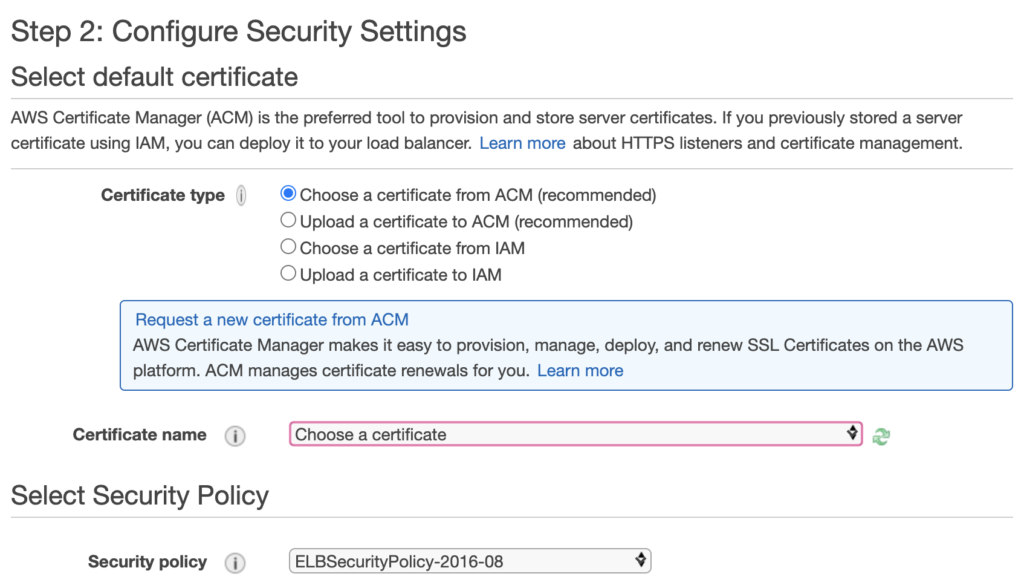
If you’ve previously set up a certificate in ACM (AWS Certificate Manager) then choose it here. If you already have a certificate you previously purchased from another provider, you can choose the option to upload it to ACM. If you don’t yet have a certificate, choose the option to request a new one from ACM and follow the instructions.
For the security policy, my current recommendation would be to choose “ELBSecurityPolicy-TLS-1-2-2017-01” as the best compromise between compatibility and tighter security. If you find older browsers have trouble with your site, you may need to go back to an older policy such as “ELBSecurityPolicy-2016-08”.
On the next page it will ask you to configure a security group. This is straightforward, since you simply need a security group that allows HTTP (TCP port 80) and HTTPS (TCP port 443) from all sources (0.0.0.0/0), so you can use an existing group if you have one, or create a new security group with those rules.
The next page is for routing and health checks.

On this page you create a Target Group consisting of the EC2 instances you want to distribute traffic across. Give the group a suitable name, and the protocol will presumably be HTTP since we’re distributing traffic across your web app. For the health check you can stick with the default of “/” assuming the root of your web site returns a standard 200 response code, otherwise you can put in a custom path for the health check if necessary.
The next page is for registering targets, and here you simply need to select the EC2 instances for your web app and add them. Then you can go on to the review page and, if all looks OK, create the Elastic Load Balancer with its associated Target Group.
Once created, it will take a couple of minutes or so for the ELB to check the targets, i.e. your EC2 instances, and if all goes well the ELB will start distributing traffic across these instances. You can check the status of the instances in the ELB by going to Target Groups and clicking on the group you just created for the ELB, to see if the instances are in “healthy” state.
Finally, you’ll want to point the DNS for your web site to the ELB so that your web traffic is going to your ELB and being distributed across your web instances. To do this, go to Load Balancers in the EC2 console, select the ELB you just created, and copy the “DNS name” shown. You’ll need to create or modify a CNAME in your DNS pointing your website to the ELB, e.g. a CNAME with www.mywebsite.com pointing to my-elb-726349475.eu-west-1.elb.amazonaws.com, replacing the details in that example with the DNS name of your website and the DNS name of your ELB. If you’re using Amazon’s own Route 53 for DNS then you can set up a DNS alias directly to the ELB, so a CNAME is unnecessary in that case.
Once the DNS has propagated, your web traffic should come in via the new ELB and be distributed across the EC2 instances running your web app.
I hope this has been helpful for providing insights on how to get a load balancer set up in AWS. If I can be of further help then don’t hesitate to get in touch to ask about my SysAdmin and DevOps services.